MacOSのKeychainをZigから使ってみたので備忘録
Zigから使うといいつつ、基本的にはCのAPIを呼び出しているだけ
基本的には以下のドキュメントでやっていることをZigで書き直す形です
- https://developer.apple.com/documentation/security/adding-a-password-to-the-keychain
- https://developer.apple.com/documentation/security/searching-for-keychain-items
CoreFoundationで色々な型が定義されており、その型の値を作成する関数も定義されているのでそちらを使います。
Keychainにパスワードを追加する
以下がサンプルコードです。
(注釈: メモリ管理に必要な処理は省略しています)
const std = @import("std");

const c = @cImport({
    @cInclude("Security/Security.h");
});

pub fn main() !void {
    const account = "example_account";
    const service = "example_service";
    const password = "example_password";

    add_generic_pass(account, service, password);
    try get_generic_pass(account, service);
}


fn add_generic_pass(account: []const u8, service: []const u8, password: []const u8) void {
    const cfAccount = c.CFStringCreateWithBytes(
        c.CFAllocatorGetDefault(),
        account.ptr,
        @intCast(account.len),
        c.kCFStringEncodingUTF8,
        0,
    );
    const cfService = c.CFStringCreateWithBytes(
        c.CFAllocatorGetDefault(),
        service.ptr,
        @intCast(service.len),
        c.kCFStringEncodingUTF8,
        0,
    );
    const cfPass = c.CFStringCreateWithBytes(
        c.CFAllocatorGetDefault(),
        password.ptr,
        @intCast(password.len),
        c.kCFStringEncodingUTF8,
        0,
    );

    var keys: [5]?*const anyopaque = .{
        c.kSecClass,
        c.kSecAttrAccount,
        c.kSecAttrService,
        c.kSecAttrSynchronizable,
        c.kSecValueData,
    };

    var values: [5]?*const anyopaque = .{
        c.kSecClassGenericPassword,
        cfAccount.?,
        cfService.?,
        c.kCFBooleanFalse,
        cfPass.?,
    };

    const query = c.CFDictionaryCreate(
        c.CFAllocatorGetDefault(),
        @ptrCast(&keys),
        @ptrCast(&values),
        5,
        &c.kCFTypeDictionaryKeyCallBacks,
        &c.kCFTypeDictionaryValueCallBacks,
    );

    const status = c.SecItemAdd(query, null);
    switch (status) {
        c.errSecDuplicateItem => {
            std.debug.print("Item already exists in Keychain.\n", .{});
        },
        c.errSecSuccess => {
            std.debug.print("Successfully added item to Keychain.\n", .{});
        },
        else => {
            std.debug.print("Failed to add item to Keychain. Error code: {d}\n", .{status});
        },
    }
}まず、Keychainに値を追加する関数はSecItemAddを使います
SecItemAddは2つの引数を取ります。1つ目は追加するアイテムを表すCFDictionary、2つ目は追加したアイテムを受け取るポインタです。今回は追加したアイテムを受け取らないのでnullを渡しています。
CFDictionaryを作る関数はCFDictionaryCreateです。
    const query = c.CFDictionaryCreate(
        c.CFAllocatorGetDefault(), // システムのデフォルトのアロケータ
        @ptrCast(&keys), // Dictionaryのキーの配列
        @ptrCast(&values), // Dictionaryの値の配列
        5, // DictionaryのKey-Valueペアの数
        &c.kCFTypeDictionaryKeyCallBacks, // Keyのコールバック
        &c.kCFTypeDictionaryValueCallBacks, // Valueのコールバック
);少し見慣れない形ですが、keysの配列とvaluesの配列を渡しており、それぞれ対応するインデックスの要素がKey-Valueペアになります。
Key-Valueペアには、使用するClassを指定するのと、そのClassに応じた値を渡します。
今回使用するのは、kSecClassGenericPasswordというClassです。
ドキュメントを元に、それぞれ以下を渡します。
kSecAttrAccountkSecAttrServicekSecAttrSynchronizable
最後に実際のパスワードをkSecValueDataで渡します。
文字列はCFString型で渡す必要があるので、CFStringCreateWithBytesで変換しています。
    const cfAccount = c.CFStringCreateWithBytes(
        c.CFAllocatorGetDefault(),
        account.ptr,
        @intCast(account.len),
        c.kCFStringEncodingUTF8,
        0,
    );
    const cfService = c.CFStringCreateWithBytes(
        c.CFAllocatorGetDefault(),
        service.ptr,
        @intCast(service.len),
        c.kCFStringEncodingUTF8,
        0,
    );
    const cfPass = c.CFStringCreateWithBytes(
        c.CFAllocatorGetDefault(),
        password.ptr,
        @intCast(password.len),
        c.kCFStringEncodingUTF8,
        0,
    );

    var keys: [5]?*const anyopaque = .{
        c.kSecClass,
        c.kSecAttrAccount,
        c.kSecAttrService,
        c.kSecAttrSynchronizable,
        c.kSecValueData,
    };

    var values: [5]?*const anyopaque = .{
        c.kSecClassGenericPassword,
        cfAccount.?,
        cfService.?,
        c.kCFBooleanFalse,
        cfPass.?,
};これによって、Class, Account, ServiceをKeyにして、パスワードを保存することができました。
以下のようにmain関数から呼び出してみます。
const std = @import("std");

const c = @cImport({
    @cInclude("Security/Security.h");
});

pub fn main() !void {
    const account = "example_account";
    const service = "example_service";
    const password = "example_password";

    add_generic_pass(account, service, password);
}今回はzig runで実行します。
使用するフレームワークを指定する必要があるので、以下のように実行します。
$ zig run -framework CoreFoundation -framework Security src/main.zig
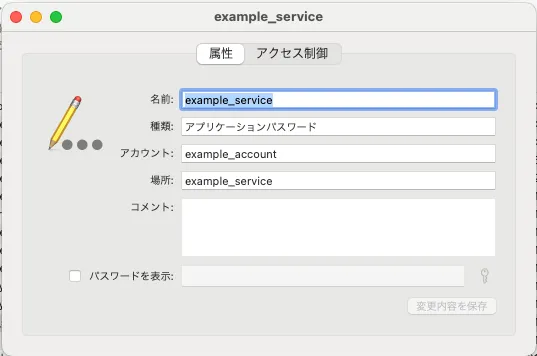
Macのキーチェーンアクセスアプリで確認すると、以下のようなキーが追加されてることがわかります。
Keychainからパスワードを読み取る
こちらもやることはほとんど同じで、SecItemCopyMatching関数を使ってキーチェーンから値を取得します。
以下はサンプルコードです。
fn get_generic_pass(account: []const u8, service: []const u8) !void {
    const cfAccount = c.CFStringCreateWithBytes(
        c.CFAllocatorGetDefault(),
        account.ptr,
        @intCast(account.len),
        c.kCFStringEncodingUTF8,
        0,
    );
    const cfService = c.CFStringCreateWithBytes(
        c.CFAllocatorGetDefault(),
        service.ptr,
        @intCast(service.len),
        c.kCFStringEncodingUTF8,
        0,
    );

    var keys: [4]?*const anyopaque = .{
        c.kSecClass,
        c.kSecAttrAccount,
        c.kSecAttrService,
        c.kSecReturnData,
    };

    var values: [4]?*const anyopaque = .{
        c.kSecClassGenericPassword,
        cfAccount.?,
        cfService.?,
        c.kCFBooleanTrue,
    };

    const query = c.CFDictionaryCreate(
        c.CFAllocatorGetDefault(),
        @ptrCast(&keys),
        @ptrCast(&values),
        4,
        &c.kCFTypeDictionaryKeyCallBacks,
        &c.kCFTypeDictionaryValueCallBacks,
    );

    var result: c.CFTypeRef = undefined;
    const status = c.SecItemCopyMatching(query, &result);
    switch (status) {
        c.errSecSuccess => {
            std.debug.print("Item found in Keychain.\n", .{});
            const data: c.CFDataRef = @ptrCast(result.?);
            std.debug.print("Successfully retrieved item from Keychain.\n", .{});
            const cstr = c.CFDataGetBytePtr(data);
            const str = std.mem.span(cstr);
            std.debug.print("Retrieved password: {s}\n", .{str});
        },
        else => {
            std.debug.print("Failed to retrieve item from Keychain. Error code: {d}\n", .{status});
        },
    }
}これも同じくzig runで実行します。
以下のようにキーチェーンアクセスの確認プロンプトが表示されます。
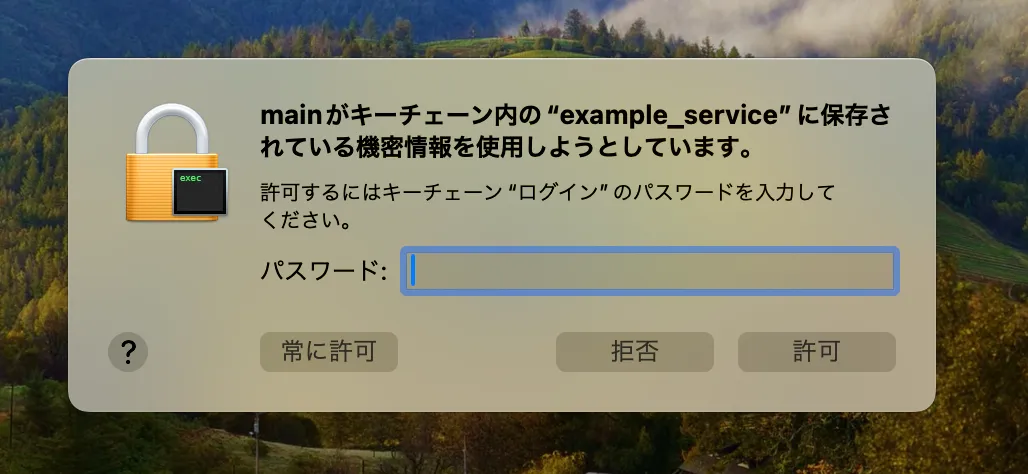
パスワードを入力すると、パスワードを読み取ることが出来ます。
